Soap Nails – Clean Minimalist Manicure Professional Guide
By Radina Ignatova, Professional Nail Expert | Last Updated: March 2026

© TheNailWiki
Quick Summary
Soap nails are a clean, glossy minimalist manicure designed to give the impression of freshly washed hands. The trend relies on sheer pink or nude polish applied in thin layers over properly prepared nails, finished with a glossy topcoat to create a smooth, glass-like shine.
Key requirements: Correct nail preparation (shaping, buffing, cuticle work), thin polish application layers, structured base coat for uniformity, and high-gloss topcoat. Success depends on technique and preparation, not just polish selection.
Contents
What Are Soap Nails?
Soap nails are a minimalist manicure trend characterised by a clean, glossy finish that gives the visual impression of freshly washed hands. The aesthetic relies on sheer pink or nude polish colours applied in thin, precise layers to create a smooth, glass-like shine that appears natural whilst maintaining a polished, professional appearance.
The trend represents a shift away from bold, maximalist nail art towards understated elegance—a continuation of the minimalist aesthetic that values clean lines, natural tones, and flawless execution over decorative complexity.
Unlike traditional natural nail manicures, soap nails require specific technical execution to achieve the signature glossy, reflective finish. The look cannot be replicated through polish selection alone—it demands correct preparation, application technique, and product layering to create the seamless, glass-like surface that defines the trend.
Featured Expert Analysis in Who What Wear UK
This guide expands on professional advice shared in a Who What Wear UK feature article where Radina Ignatova, Professional Nail Expert and Educator, was quoted explaining the technical requirements for achieving soap nails correctly.
The following analysis provides comprehensive technical detail on the preparation protocols, application techniques, and professional standards required to execute soap nails safely and correctly—addressing the structural and safety considerations often omitted from trend-focused consumer content.
Expert Quote from Who What Wear UK
“Soap nails are a clean, glossy manicure that gives the impression of freshly washed hands. They are usually done in sheer pinks or soft nudes with a smooth, glass-like shine.”
— Radina Ignatova, Professional Nail Expert, Who What Wear UK
Technical Requirements for Soap Nails
Achieving the clean, uniform appearance of soap nails requires more than polish application—it demands structural uniformity across all ten nails and meticulous surface preparation.
Structural Requirements
The minimalist aesthetic of soap nails eliminates visual distractions, which means any structural irregularities become immediately visible. The following elements must be addressed during preparation:
- Nail plate surface: Must be smooth and free from ridges, which become magnified under sheer polish and create an uneven, textured appearance rather than the desired glass-like finish.
- Nail shape consistency: All ten nails must be shaped identically to create visual symmetry. Inconsistent shaping disrupts the clean, uniform aesthetic even when polish application is flawless.
- Cuticle definition: Clean cuticle lines are essential for achieving the polished, freshly-washed appearance. Overgrown or uneven cuticles create visual breaks in the smooth transition from skin to nail plate.
- Nail length uniformity: Whilst soap nails can be executed on any length, variation in length across hands disrupts the balanced, minimal aesthetic.
Product Requirements
The layering sequence and product selection directly impact the final result:
- Structured base coat – Creates a smooth, uniform surface and provides slight opacity to mask natural nail colour variation, ensuring consistent appearance across all nails.
- Sheer polish in blush, nude, or soft pink tones – Must be applied in thin layers to maintain translucency whilst building subtle colour. Thick application eliminates the natural, barely-there quality.
- High-gloss topcoat – Provides the reflective, glass-like finish that defines soap nails. A matte or satin finish fundamentally alters the aesthetic and eliminates the characteristic shine.
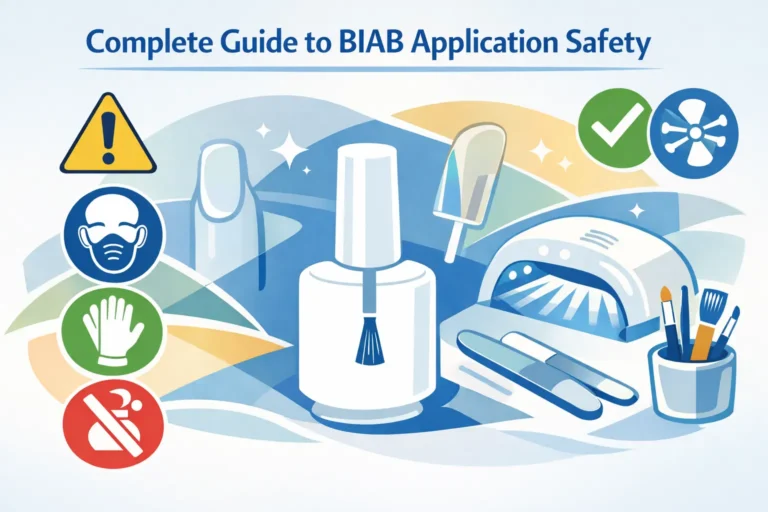
For technicians working with clients seeking extended wear, builder gel (BIAB) can be applied in natural or sheer pink tones to create a soap nails aesthetic with longer durability and added structural support.
Professional Preparation Protocol
Correct preparation is the foundation of successful soap nails. The following protocol ensures structural uniformity and surface smoothness required for the clean, glossy finish.
Step 1: Nail Shaping
Shape nails into a soft square or rounded shape with consistent length across all ten nails. The shape must be uniform—measure and compare opposing hands to ensure symmetry. Use a fine-grit file (180-240 grit) and file in one direction to prevent splitting and maintain smooth edges.
Step 2: Cuticle Work
Gently push back cuticles using a cuticle pusher after softening with cuticle remover or warm water. The cuticle (the thin layer of tissue that seals the nail plate to the eponychium) should be softened and pushed back, not cut or removed.
⚠️ Safety Warning
Never cut living tissue. Cutting the cuticle or eponychium creates entry points for bacterial and fungal infections and increases the risk of inflammation, paronychia, and chronic nail damage. Proper cuticle work involves gentle softening and pushing back, not cutting or aggressive removal.
Step 3: Surface Buffing
Lightly buff the nail surface using a fine buffer (240-400 grit) to smooth ridges and create an even surface. Avoid over-buffing, which thins the nail plate and increases sensitivity. The goal is smoothness, not significant nail plate removal.
After buffing, cleanse nails thoroughly with isopropyl alcohol or a specialised nail cleanser to remove oils, dust, and debris that would compromise polish adhesion.
Application Technique
The application sequence and layering technique directly determine the final result. Rushed or thick application eliminates the sheer, natural quality that defines soap nails.
Base Coat Application
Apply a structured base coat in a thin, even layer covering the entire nail plate from cuticle to free edge. The base coat creates a uniform surface, masks natural nail colour variation, and provides adhesion for subsequent polish layers. Allow the base coat to dry completely before proceeding.
Polish Application
Apply sheer polish in one to two thin coats. Thin layers are essential—thick application creates opacity and eliminates the translucent, natural appearance. Each layer should be barely visible when applied, building subtle colour gradually rather than attempting full coverage in a single coat.
Use controlled brush strokes: one stroke down the centre of the nail, followed by one stroke on each side. Avoid excessive brush pressure, which deposits too much product and creates uneven thickness. Allow each coat to dry fully before applying additional layers.
Topcoat Application
Apply a glossy topcoat in a single, smooth layer covering the entire nail surface. The topcoat creates the reflective, glass-like finish that defines soap nails. Apply topcoat in slightly thicker application than the polish layers to create depth and shine, but avoid flooding the cuticle area or creating pooling at the free edge.
Optional finishing step: Apply cuticle oil to the surrounding skin after topcoat has fully dried. This enhances the clean, polished appearance by hydrating the cuticle area and creating a healthy, well-maintained look.
Common Professional Mistakes
Even experienced technicians frequently make specific errors when executing soap nails for the first time. These mistakes typically stem from treating soap nails as a standard natural nail manicure rather than recognising the specific technical requirements.
Mistake 1: Thick Polish Layers
Applying thick coats of sheer polish creates a milky, opaque finish instead of the translucent, glass-like appearance. This is the most common technical error and fundamentally changes the aesthetic from natural and minimal to heavy and artificial.
Solution: Apply polish in barely-visible thin layers. Each individual coat should appear almost transparent when wet. Build colour gradually through multiple thin applications rather than attempting coverage in one or two thick coats.
Mistake 2: Skipping the Base Coat
Applying sheer polish directly to unprepared nails without a structured base coat creates uneven colour distribution as the polish absorbs differently across the nail plate. Natural nail colour variation becomes visible, disrupting the uniform, clean appearance.
Solution: Always apply a structured base coat to create a uniform surface. The base coat should provide slight opacity to mask natural nail variation whilst maintaining a natural appearance.
Mistake 3: Inconsistent Nail Shaping
Failing to create identical nail shapes across all ten nails disrupts the balanced, symmetrical appearance that soap nails require. Even perfect polish application cannot compensate for inconsistent structural foundation.
Solution: Measure and compare nail shapes across both hands during shaping. Check length, width, and shape profile from multiple angles to ensure uniformity before beginning polish application.
Mistake 4: Poor Topcoat Application
Applying topcoat too thinly, unevenly, or using a satin-finish product instead of high-gloss eliminates the reflective shine that defines soap nails. Without the glass-like finish, the result appears flat and dull.
Solution: Use a dedicated high-gloss topcoat applied in a single smooth layer with slightly heavier coverage than the polish layers. Ensure complete, even coverage from cuticle to free edge without flooding or pooling.
Soap Nails vs Milky Nails
Soap nails and milky nails are frequently confused or used interchangeably in consumer content, but they represent distinct aesthetic approaches with different technical requirements.
The primary distinction lies in opacity and natural appearance. Soap nails prioritise translucency and minimal visibility, creating the impression of naturally healthy, clean nails. Milky nails use higher-opacity polish to create intentional colour presence whilst maintaining a soft, understated aesthetic.
Safety and Contraindication Considerations
Whilst soap nails are generally considered a low-risk service, certain conditions require assessment before proceeding with preparation and application.
Contraindications Requiring Assessment
The following conditions may require service modification or avoidance:
- Active nail infections: Bacterial or fungal infections require medical treatment before cosmetic services can be performed safely.
- Damaged cuticles or eponychium: Existing trauma, inflammation, or open wounds contraindicate cuticle work until healing is complete.
- Severely ridged or damaged nail plates: Buffing requirements may exceed safe limits for compromised nails. Consider alternative approaches or decline service.
- Recent nail trauma: Haematomas, separation, or recent injury require healing time before cosmetic services.
- Contact sensitisation history: Clients with known allergies to polish ingredients require patch testing or product substitution.
Professional nail technicians should reference comprehensive contraindication guidelines and maintain detailed client consultation records to identify potential safety concerns before service delivery.
Professional Training
Comprehensive training on nail preparation, product application, and safety protocols is available through structured online nail training courses covering professional standards and technique development.
Related Articles
Frequently Asked Questions
What is the difference between soap nails and natural nails?
Soap nails involve deliberate polish application to create a clean, glossy finish, whilst natural nails refer to unpolished nails or nails with minimal intervention. Soap nails require structured base coat, sheer polish, and glossy topcoat to achieve the characteristic glass-like shine, whereas natural nails may have no product application whatsoever.
How long do soap nails typically last?
Standard polish soap nails typically last 5-7 days before chipping or dulling occurs. Gel polish versions extend wear time to 2-3 weeks. Builder gel applied in sheer or natural tones provides the longest durability at 3-4 weeks, whilst maintaining the soap nails aesthetic with added structural support.
Can soap nails be achieved with gel polish?
Yes. Gel polish can be used to create soap nails by selecting sheer pink or nude gel colours and applying in thin layers with a glossy gel topcoat. The technique remains the same—thin application layers and high-gloss finish are essential regardless of product type.
What nail shape works best for soap nails?
Soft square and rounded shapes are most commonly used for soap nails as they complement the minimalist, natural aesthetic. However, soap nails can be executed on any nail shape provided the shape is consistent across all ten nails and the preparation protocol is followed correctly.
Is buffing required for soap nails?
Light buffing is recommended to smooth ridges and create an even surface for polish application. However, buffing should be minimal to avoid thinning the nail plate. Nails with severe ridging may require alternative approaches such as ridge-filling base coats or builder gel overlays instead of aggressive buffing.
Can soap nails be done on natural nails or do they require extensions?
Soap nails are typically executed on natural nails without extensions. The aesthetic emphasises natural appearance and minimal intervention. However, the same principles can be applied to nail extensions by using sheer or natural-toned builder gel or acrylic to create the clean, glossy finish on extended length.
What is the best polish colour for soap nails?
Sheer pinks, soft nudes, and blush tones with warm undertones are most commonly used. The colour should be barely visible when applied in thin layers, creating subtle enhancement rather than obvious colour presence. Popular professional choices include OPI Bubble Bath, essie Ballet Slippers, and similar ultra-sheer formulations.
Why do my soap nails look milky instead of sheer?
This indicates thick polish application. Milky appearance results from applying too much product in a single coat or using insufficient drying time between layers. To correct this, remove the polish and reapply in thinner layers with complete drying between coats. Each layer should be barely visible when wet.
Professional Disclaimer
This guide provides educational information on soap nails technique and safety considerations. It does not constitute professional training, certification, or medical advice. Nail technicians should complete comprehensive training and maintain current knowledge of safety protocols, contraindication assessment, and professional standards before performing services on clients. When in doubt about any nail or skin condition, refer clients to qualified medical professionals for diagnosis and treatment.
Radina Ignatova
Professional Nail Expert | International Nail Educator
I am Radina Ignatova, a Professional Nail Expert since 2014 and International Nail Educator, based in Scotland, UK. I am the Founder of Artistic Touch Nail Training Academy and TheNailWiki.
At Artistic Touch Nail Training Academy, I provide structured professional online nail courses specialising in dual forms, gel systems, polygel application, advanced nail structure, e-file work and Russian manicure, with a strong focus on professional salon safety. I continue to work actively in salon practice, ensuring that all education reflects real client scenarios and current industry standards.
My teaching philosophy is simple: I show real salon challenges, real mistakes and real performance testing, not just perfect demonstrations. This is how you develop genuine technical competence and become a confident, capable nail professional.
Every Artistic Touch course includes lifetime access, a certificate of completion and access to a dedicated student support group, where I provide ongoing guidance and professional feedback.
Featured in: Who What Wear UK
About TheNailWiki
TheNailWiki is an independent educational platform dedicated to providing accurate, safety-led and professionally informed nail care information to professionals and enthusiasts worldwide. All content is created by qualified nail industry professionals and reviewed for technical accuracy.
Our mission is to provide accurate, safety-focused and professionally informed nail education that is accessible to everyone. For structured professional training, advanced masterclasses, and specialist technique courses, visit Artistic Touch Nail Training Academy.
Note: This wiki library page expands on professional analysis featured in Who What Wear UK. All technical guidance reflects professional nail industry standards and safety protocols. TheNailWiki is an independent educational resource and maintains editorial independence from all commercial interests.